Can You Create an Online Community With Teachable?
6 minute readThe online business world is changing: people are looking for more personalized connections, and the human touch is becoming increasingly important.
To cater to these new needs, online communities are born. An online community is a group of people interacting with each other over the internet, often centered around a shared interest, hobby, or goal.
If you run an online business, bringing people together and creating new connections should be one of your main priorities.
This is especially true for online course creators, as students who take an online course can benefit from the value and human touch provided by an online community.
Can you Create an Online Community Using Teachable?
No, Teachable doesn't offer a built-in online community feature. If you are a course creator who uses Teachable, you cannot create a community inside your program for your students.
The best you can do is integrate with a Circle community. With Teachable, you can only connect a Teachable school to Circle.
This means that if you want to add a community to your Teachable account, you need to sign up for this third-party tool and pay an extra monthly subscription - on top of your Teachable fee.
Circle's pricing plan starts at $39/month, but that is not enough for most creators who want to build and grow a thriving online community. To get the most out of Circle (and get unlimited members in your community), you would need their professional plan - priced at $89/month.
That is a lot of money!
Especially since you have your Teachable account subscription on top of it ($119/month if you pay annually is their recommended plan).
And let's not forget that Teachable charges you a fee for every sale you make.
But wait, doesn't Teachable have a free plan? Yes, but you can only integrate with Cirlce if you are on one of their paid plans.
All in all, just to use this community, you are looking at spending more than $200/month...
This pricing is if you paid annually, making it an investment of more than $2400 per year...
That is crazy, right?
Even if you were willing to spend all of this money each month, you would not have the same flexibility that a built-in community allows.
Since the community is on a separate platform from your courses, you cannot sell bundles that include a community channel or easily direct students to your community. Your Teachable students have to navigate to a different platform and log in again in order to access the community... It is just not ideal.
So there is got to be a better way to add a community to your online course business. And yes, there is.
Save Hundreds of $ and Get a Better Community With Heights Platform
The community in Heights Platform is located right inside your account, alongside your online courses and digital products.
Heights Platform is the all-in-one online course software that offers a built-in community, and more awesome features!
This means that from the moment you turn on the community, students can easily spot the community space and dive into the conversation without having to leave your course page or log into another platform.

The community is free to use for all Heights Platform's creators (from the Basic plan up)!
Heights monthly basic plan is actually $10/month less than Teachable's Basic plan, but you get so much more value out of it! And no transaction fees.
First of all, you get a free community to interact with your students, and you can fully customize it and structure it the way you want.
We also don't charge any transaction fee and we do not take any percentage off your earnings, so 100% of the revenue from your courses and products is yours to keep!
Here we talk more about the differences between Heights Platform and Teachable.
How to Build a Community Using Heights Platform
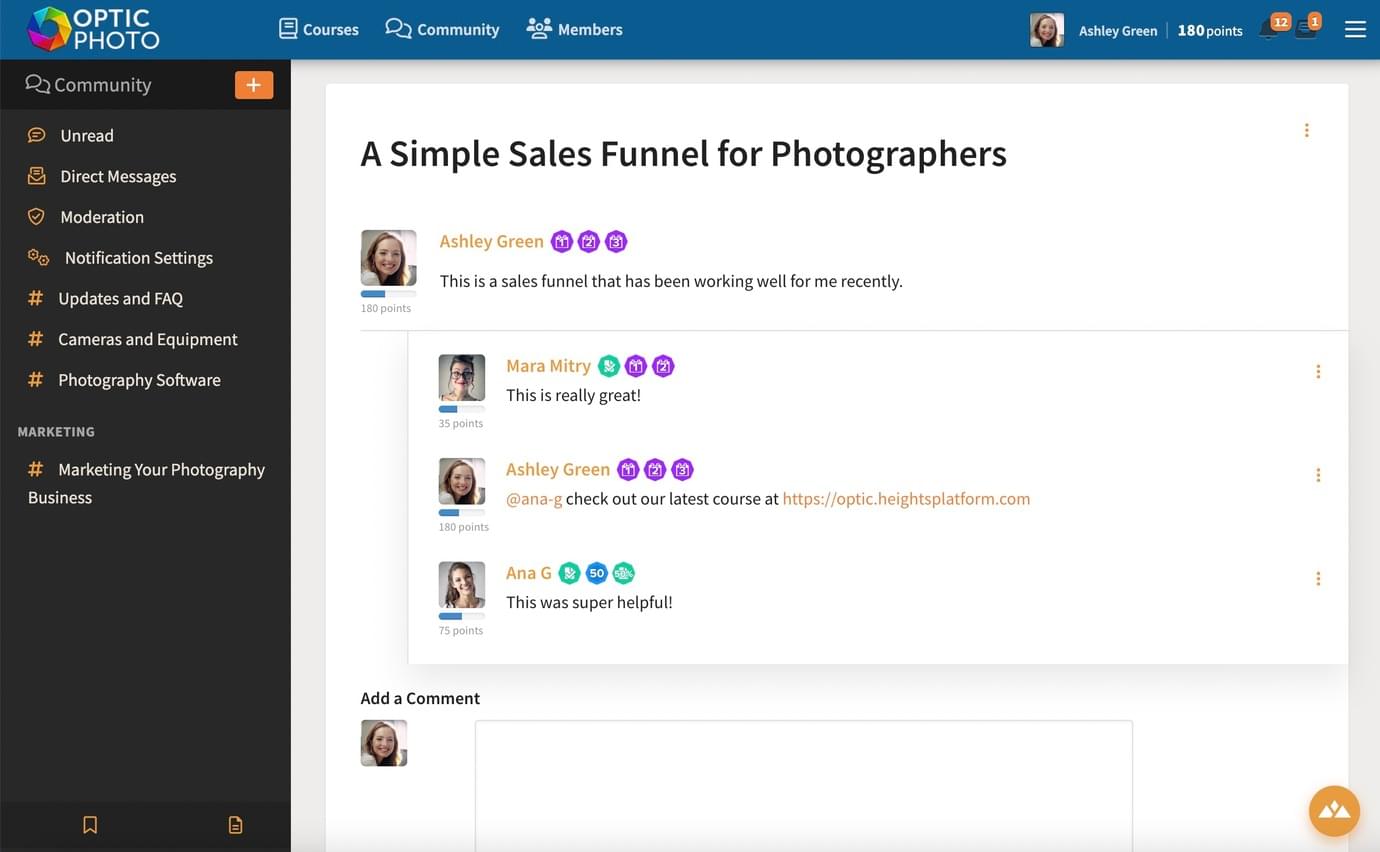
Heights Platform lets you create a community space where your members and students can connect with each other. They can ask questions, discuss specific topics, and share ideas with the community.
Now, let's take a closer look at how the community feature works within the Heights Platform.
Step #1: Start Creating Your Online Community
The community feature is automatically enabled for all creators using Heights Platform, but you can temporarily disable it in the Account Settings if you wish.
The best part about Heights Platform's community is that you can fully customize it according to your needs.
Creators and community admins can organize the community area by dragging and dropping channels and channel groups to reorder them on the sidebar for everyone to see.
Communities follow a specific hierarchy that governs how you see the content. Let's see what the main elements of the Height's online community feature are and how to make the most out of them:
Step #2: Create Community Channels
In Heights Platform's community feature, you can group conversations into dedicated spaces called channels.
A channel can either be part of your entire community or be made private by adding it to a Bundle, which can be sold separately.
By adding a channel to a Bundle, only students who have access to the Bundle will be able to access that particular channel.
This allows you to control who can see and participate in specific conversations within your community.
To create a new channel in Heights Platform's community feature, click on "Create Channel."
This will take you to a page where you can name the channel and provide a description. You can also choose a parent Channel Group or choose not to group this channel. Channel Groups are used to categorize and group different channels.

While you don't have to create a channel group to use the community feature, they can be helpful in organizing the content and providing a clearer structure for your students.
By default, a channel and its posts are visible to all students. However, if you don't want students to post in the new channel, you can check the "Locked" box.
This will allow students to access the content in the channel but prevent them from posting. This is useful if you want the channel to serve as an announcement or rules channel.
Step #3: Write Your First Community Post
Now that you have set up your online community, you can go ahead and start your first conversation!
In each post, you can add pictures, customize the style and look of your text, and add links and media content.

You can also choose to "Lock" your post (meaning students won't be able to comment under it) or "Pin" it (it will always appear at the top of the channel together with unread and followed posts).
After publishing a post, you can always go back and edit it.
Step #4: Organize Your Online Community
You can reorder channels and channel groups by dragging and dropping them on the left sidebar within the community. If you need to change any channel settings, you can always go back and edit them.
You can choose to hide a channel and limit community access. This can be useful if you want to sell access to that channel separately or as part of a bundle, or if you want to limit which students have access to certain channels.
To hide a channel, you need to add it to a bundle first. Once a channel is in a bundle, it will only be visible to students who have purchased that bundle or have been granted access.
Hidden channels won't appear on the community page, even if a student has posted on them before.
Step #5: Moderate the Community
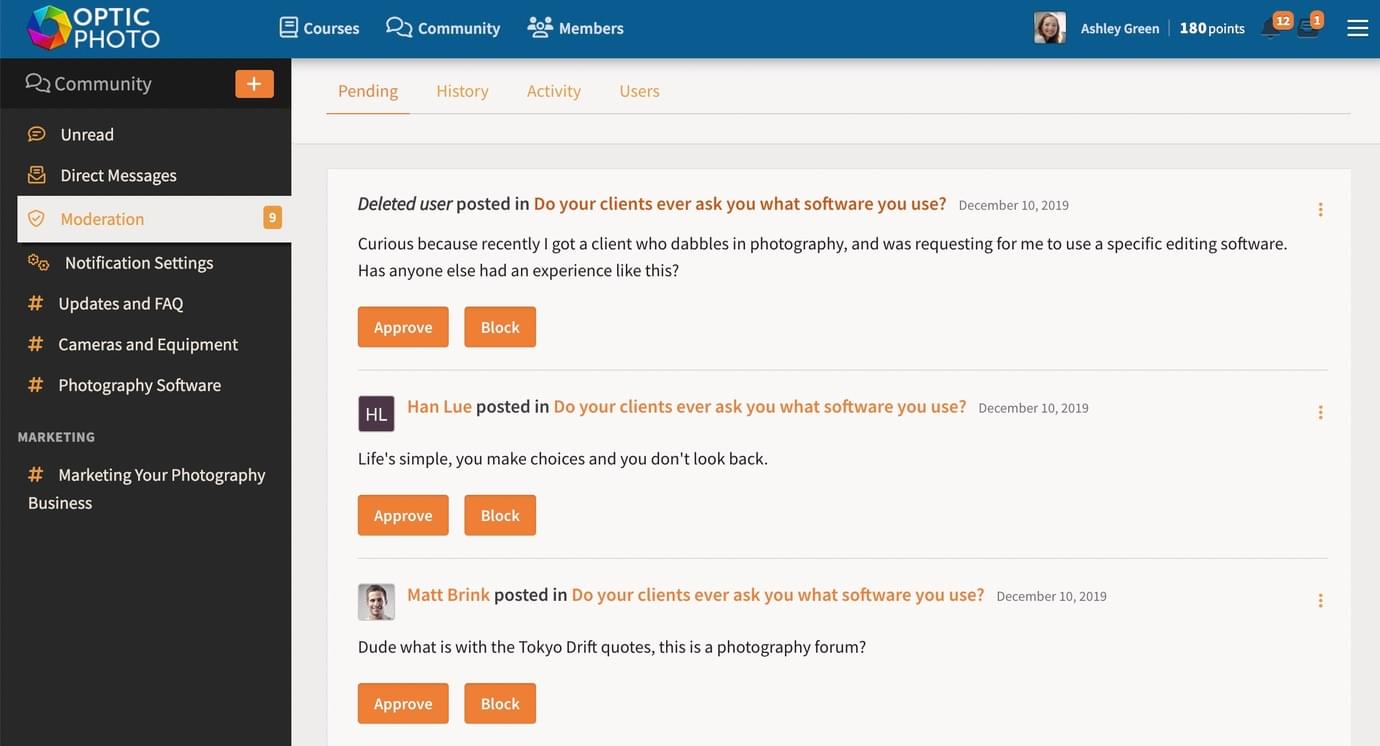
Community moderation is crucial to maintaining a positive and productive environment for your students.
As a creator, it's your responsibility to set clear community guidelines and expectations to craft an awesome community experience.
It's also a good practice to have a team of community moderators to monitor and moderate the community. Moderators can help flag inappropriate posts, answer questions, and facilitate discussions.

Remember that the community feature in Heights Platform is designed to encourage engagement and collaboration among your students. By fostering a welcoming and respectful community, you can create a space for your students to learn and grow together.
Build a Thriving Online Community Using Heights Platform
There is no Teachable community feature: all you can do is integrate with third-party tools that are expensive and not practical for your course students,
This means that you have to create a separate account, pay an extra monthly fee, and send your members to a different online space when they want to join the community.
The solution is to find a community platform that includes everything you need for your online business. This includes the ability to sell digital products, create online courses, and coaching programs.
Heights Platform is an all-in-one online course and community platform that lets you create courses and also includes a community inside your program. With Heights Platform, your members can easily access your courses, challenges, community space, and coaching from one place without switching between different platforms.
Try out our built-in community today by creating a free Heights account!
Create Your Online Course Today


